Mostrando entradas con la etiqueta streamer. Mostrar todas las entradas

miércoles, 22 de mayo de 2013

PAYARA ON THE FLY


Strangely the Payara (Hydrolycus Armatus, H. Scomberoides,) is a fish that has been pursued more with Rapalas, plugs and other artificial lures than with flies. If we compare the number of people who have flyfished for them with success with the number of people who have fished for them on spinning or casting, we might think this fish won’t fall that much for a lure made out of  feathers and artificial hairs. The truth is it attracts their attention pretty much! It’s just a task that hasn’t been entirely done.


The Payara is an agressive fish that attacks the fly with amazing strength and speed, it jumps and runs with extremely violent and spectacular displays of power. A fish that stands out above all others by it's physical characteristics, a silvered fusiform body that denotes strength, a wide tail which transalates into speed and power, and above all, large jaws with the most impressive fangs you could ever see which are the main characteristic of the species.
 They can reach a weight of 40+ pounds, though fish between 15 and 25 pounds are the most common.
They are obvious carnivores, their toothy jaws with pointy teeth of about an inch in length and two tusks of up to 3 inches long confirms it. In it's evolution they developed the ability to change forever their teeth whenever they crash them when they attack armored fish such as catfish species (Silurids) or some plecos fish (Loricarids). They will also attack turtles and birds!


They inhabit all the tributaries of the Colombian Orinoco and Amazon basins, prey on each and every fish around. Never uncommon to see schools of prey fish breaking the surface jumping all over the place while escaping an attack.


How can we find them and catch them

Banks: At the end of the rainy season, flooded savannahs begin to drain down creating waterfalls into the river carrying out large amounts of food into it concentrating all kinds of fish. The waters which have not yet fully clarified promote some pretty aggressive hunts. If you can see your hand at about 16 inches deep, then the conditions to work this area are given.
Find water 3 feet to 10 feet deep with medium to fast currents, work the fly along structures such as rocks, logs and dark holes in the bank.
If you see no activity but you see that rocks in the bank walls are wet then you better start working, this means they are around and have being shacking some water and prey.


In mouths of creeks, rivers and lagoons: remember that everything draining out favors them. Most mouths of streams and creeks offer good fishing as far as it goes into the dry season. The lagoon mouths are very good at the beginning of the season because of the amount of water they supply to the river before drying out. This places concentrate Payara schools that generally won’t exceed the 8 pound range (fun size!) although it is not uncommon to find specimens of larger size.


Deep pools: Payaras generally move into deeper water as temperature rises during the day, they will return to the shallows as the temperature lowers in the afternoon and night. Fishing changes here, you must get your fly down, most pools are 10 to 30 feet deep. You might want to work the column efficiently by trying different depths, bigger ones usually stay down. 


Strong currents, their anatomy allows them to hunt in such waters, this are the most difficult waters to fish, they will stay down with their bellies on the gravel to save energy and will rise up to swallow any fish compromised by the current. Mending your line with heavy flies will entice them to strike, but it will be hard to get that hook in their bony mouth as the slacks in the line sometimes won’t let you strike immediately.


Whenever you see them reluctant to take the fly while returning to the depths in their characteristic arch movement, change your flies and strip faster. Try the exact opposite of what you are using, for example if it’s a medium sized fly in dark colors, tie a larger one with lots of flash in lighter colors, change your stripping! Usually working the fly faster will do the trick.
A full moon allows us to catch them late into the night with a floating or an intermediate line. Lower temps will pull them up to hunt the river banks and any other structures as their visibility increases with the moon light. Moving water flies such as Dahlberg divers or Reducers are a clever choice.


THE TACKLE

Rods and reels

8 to 10 weight  fast action rods are recommended. Big flies are needed for this fish, so the rod of your preference will depend on your casting skills. A quality reel with a smooth drag, capable of holding at least 150 yds of backing will complete your set up. Gloves or stripping finger protection is always a wise choice, heat will dry the line and fingers and fast runs of the fish or even stripping can easily cut through your skin.


Lines

Due to the environment, tropical lines are a must!
Different conditions will be present during a fishing trip for payaras, you might find them along   drop-offs in the beaches, cruising flats, along steep banks, in fast running waters or deep pools. RIO tropical lines make choices an easy thing for such varied scenarios.                           
 Tropical Outbound short lines in floating and floating/intermediate tips will cover all ranges of “shallow” depths. Very long casts are easy to make whenever the situation calls for it, handling wind resistant flies with accuracy is never an issue.
When fishing strong currents, cut banks and deep pools, best choice is RIO’s Deep Sea Leviathan 26 ft sink tips in 300 to 400 grain weights. The powerful front tapers allow large and weighted flies to be casted with ease. The strong cores will resist the harsh conditions you will find in this waters, plus the tropical coating will prevent lines from wilting and tangling in the heat

Leaders


Payaras are not leader shy. Whether you tie your own or purchase pre-tied leaders RIO has some nice products.  A shock tippet, due to the toothy mouth of this fish is a must. RIO’s Toothy Critter leaders with nylon coated wire shocks in 15 lbs to 30 lbs will do the job. If you like to tie your own, RIO’s Hard Alloy SW mono and RIO’s Powerflex Wire Bite Tippet are the best choice to customize the length and strength of your leaders.                                                                 
As a rule of thumb, 6 to 7.5 ft leaders for floating and intermediate lines will help you cast and work the fly efficiently. 3 to 5 ft leaders for sink tip lines will help you get the fly deep faster.


Flies

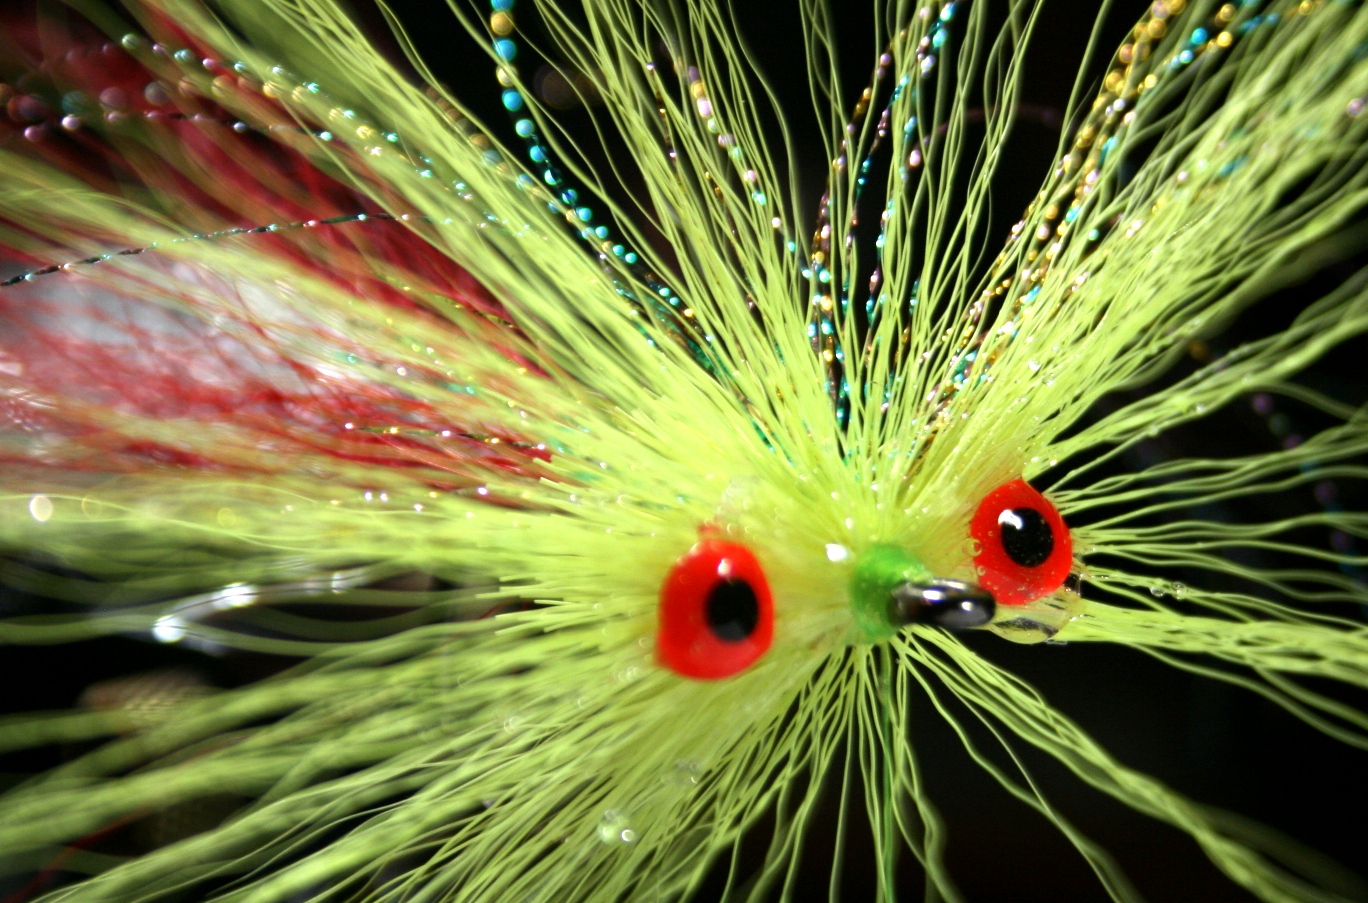
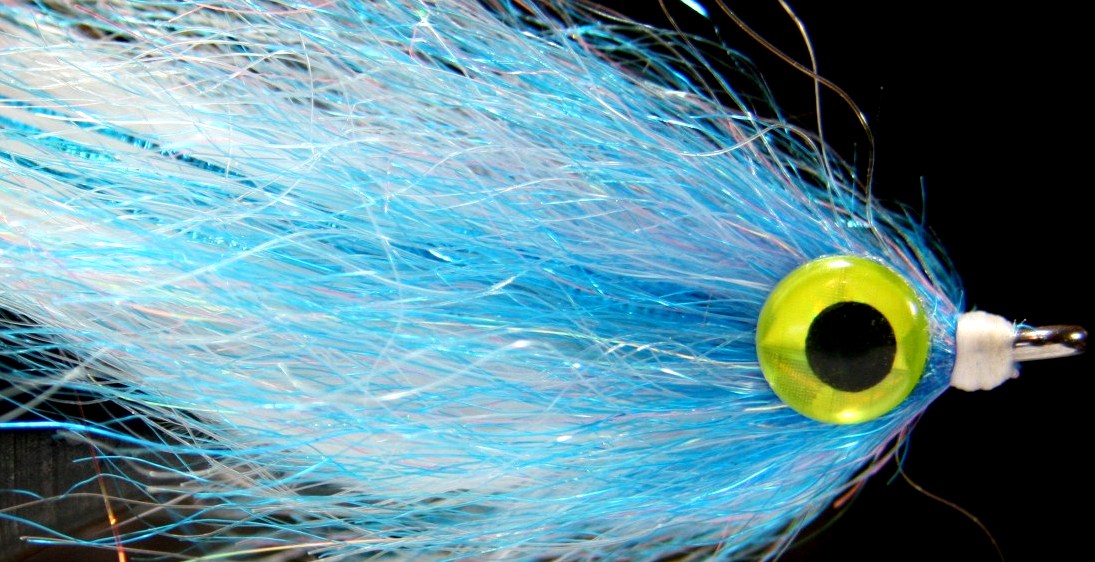
There is just one way to go, BIG, or even HUGE! Several patterns tied on short shank or long shank 3/0 to 5/0 hooks will work as long as they are large and feature a big profile. Bait fish patterns in white/chartreuse, white/blue, white/black, red/yellow, black/purple, black/brown colors with lots of flash are always a good choice. Deceivers, Reducers, Beadles billfish flies, EP big eyes, Mega mushies etc, are all effective for payara. Large Clouser minnows, Half n´ Halfs and Whistlers will be useful as well. 
                          

Light wire yet strong hooks are highly recommended to improve penetration as payara mouths are hard and bony making hook ups tricky. It´s also never unusual to have a strike and see the fish jumping for several seconds before it opens its mouth only to see the fly floating away in the air just because it was tangled in its large teeth, this is when tarpon talk comes in –  “Oh man I jumped 6 payaras and landed 2….!!”  
There is no need for tandem hook flies, experience has shown that even short shank hooks provide solid hook-ups as payara attack their prey in the forward portion of the body. They will stab first and then they will swallow.
Don’t forget poppers, as they are so useful and a lot of fun to see whenever there is surface action. Early in the morning, late in the afternoon or even in full moon nights working poppers on a tropical Outbound line will make them crazy! Make sure you have plenty of poppers, those teeth are never forgiving.


TIPS

- Setting the hook in this fish mouth is tricky so there should be no finesse, a strong, repeated strip strike, just as it’s done in tarpon fishing will improve your chances. After that, be prepared to clear your line as it gets to the reel. Fast runs, jumps and even tail walking will keep you busy for a while.

- Always keep a tight line and be prepared for sudden movements, they will sometimes charge towards you, reel in! They’ll turn around, jump and run again.

-Turn their heads!! Don’t be afraid to apply high amounts of pressure to the fish, even in fast currents. That will reduce the fight time and improve the chances for a fast and safe release.

- It’s wise to use a net or a fish cradle to handle them, if you don’t have one, this fish provides a firm grip at their tails just like salmon do keeping their head away from you. Avoid rising them from the tail, their organs will suffer bad injuries, it is best if you handle them in the water.

- Watch out for those teeth while removing the fly, you’ll probably realize that as you look into it though. Hold the fish firmly and use your pliers.

- Barbless hooks will make it easier to release the fish fast and keep you safe. It’s impossible  to resist taking pictures of this fish and such fangs, just hold them horizontally to take the pic, keep them in the water in between shots.

- Swish it back and forth in the water before releasing, make sure it’s ready and let go! 


CATCH N' RELEASE
LET'S KEEP THE WATERS ALIVE!!


© Armando A. Giraldo – Derechos exclusivos sobre imágenes y textos 

martes, 15 de mayo de 2012

KINKY MUDDLER

Aquí se le dan los créditos respectivos a quienes amarran estas moscas innovadoras que han probado ser muy efectivas. El Kinky muddler es una mosca que se inventó un personaje llamado Jonny King. Un neoyorquino que pesca bastante.

Esta mosca me llamó la atención por su forma, perfil y por sobre todo, sus materiales.
La idea de mezclar materiales naturales y sintéticos me parece perfecta sobre todo hoy en dia que abundan tantas opciones artificiales que pueden reemplazar de una u otra forma algunos materiales naturales. Además nos permite enriquecer el atado con distintos colores y mezclas, brillos y texturas aparte de  aumentar la resistencia y el movimiento de las moscas mientras desplazamos una buena cantidad de agua.

Con ustedes el Kinky Muddler!


Materiales

Anzuelo: Octopus 1/0 - 5/0, la idea es que sea corto y tenga un gap amplio.

Hilo: flat waxed

Cola: 4 a 6 hackles

Brillos: flashabou y wing n flash

Cabeza: Kinky hair o alternativo

Ojos: de pegar 3D

Pegantes: cianoacrilato y cemento para moscas.


El amarre


1. El anzuelo, según el tamaño y el grosor le dará mayor peso a la mosca. Si es liviano la mosca tenderá a flotar, si es más pesado tenderá a undirse más fácil.


2. Amarramos los hackles y el flashabou.


3. Atamos el kinky hair de color claro para formar el abdomen. La clave está en atar siempre de lado formando una V, mientras esparcimos los pelos en el anzuelo con ayuda de la uñá antes de apretar con el hilo.


4. Hacemos lo mismo por encima del anzuelo amarrando el kinky de color oscuro en el mismo sitio en el que amarramos el de color claro, recuerde usar la uña para esparcir los pelos antes de apretar el hilo. Una vez terminemos le ponemos una gota de cianoacrilato, zap a gap, pegadit etc, para evitar que se giren los materiales y aguanten mejor los mordiscos.


5. Cada vez que terminemos un bloque de colores avanzamos hacia adelante y empezamos de nuevo. Cada tanda de pelos ayuda a que los siguientes se vayan parando. Podemos adicionar entre estos pelos un poco de wing n flash para que al formar la cabeza quede más brillante y atrayente.


6. Al terminar de llenar el anzuelo con los pelos la mosca se debe ver así.


7. Sacamos la mosca de la prensa y presionamos de arriba hacia abajo los pelos para que estos se expandan y nos de una mejor idea de como cortarlos para darle forma al pescadito. Hacemos lo mismo de lado a lado para formar el perfil.


8. A medida que vayamos cortando nos debe ir quedando la cabeza de esta manera. Siempre del ancho de los hackles para darle continuidad al perfil.


9. Montamos en la prensa, retocamos y procedemos a pegar los ojos con cianoacrilato, zap a gap o pegadit.
Ojo! la cabeza no debe quedar excesivamente plana en los lados, es mejor redondeada o en forma de bala. De esta manera al pegar los ojos se verá más natural y su movimiento será mayor.


10. Pegamos ojos de tamaño proporcional.


11. Terminamos con un whip finish, cemento al hilo y opcionalmente por encima de los ojos para asegurarlos mejor a los pelos.


Los Kinky muddlers no necesariamente se deben hacer con Kinky hairs, hay muchos otros materiales sintéticos con los que pueden hacer la cabeza. Los hackles en la cola se pueden reemplazar con marabou, zonker, hackles atados horizontálmente, schlappen, bucktail, Yak hair etc.


Otros Kinky muddlers


                                                En verde y blanco con hackles

<><><><><><><><>
Azul y blanco con marabou


Con zonker


En negro y veige con zonker, Ep fibers y lana, la GUAPUCHA FLY para trucha!!

Esta mosca funciona con prácticamente todas las especies, solo es cuestión de agrandarla o reducirla en tamaño según los peces que persigamos. Es muy versatil en la mesa de atado, podemos añadirle peso para trabajarla como un jig, atarla a manera de bendback e incluso alargar los anzuelos en el caso de pesca de trucha.


Si la pescamos con línea floating y el anzuelo en el que está atada es liviano funciona como un slider, salvo en el caso de usar lana o cualquier material que absorba bastante agua.

Buena pesca y recuerde capturar y soltar con todo el cariño que amerita el caso!

© Armando A. Giraldo – Derechos exclusivos sobre imágenes y textos


jueves, 23 de febrero de 2012

EL REDUCER

El Reducer


El Reducer es un tipo de mosca relativamente nuevo, es una versión para Pavón atada por Rob Anderson quien tiene la autoría de otro par de moscas famosas para trucha.

Esta mosca tiene la enorme cualidad de desplazar una gran cantidad de agua y de ser bastante liviana a pesar de lo grande que pueda ser. El movimiento adicional que le procura la disposición de los ojos al pelo de venado, a la cola y a la gran cantidad de flashabou que sobresale de ella la hacen extremadamente atractiva.

La pude provar con un éxito increible el año pasado en el Río Vita y este año ya ha sido tema de bastantes conversaciones. Es una mosca que ha provado ser bastante buena en los llanos colombianos, además de tener versiones más recientes para pescar Tarpon, Róbalo y otras especies en el mar. 

Pavón (Cichla temensis) Río Vita


A continuación su receta!

Anzuelo - Octopus 3/0 a 5/0
Hilo - Flat waxed
Cola - Flashabou plata, cobre o dorado, pelo artificial o Hackles
Collar - Bucktail o cola de venado
Cabeza - Bucktail
Ojos - Prisma
Pegantes - Cianoacrilato y epóxico de 6 minutos.


1. Con el anzuelo en la prensa atamos una cantidad considerable de flashabou, este puede ser plateado, cobre o dorado.


2. Atamos la cola sobre el flashabou. Tenga en cuenta que ésta no sea más larga para que el flashabou quede libre. La cola puede ser con hackles o con pelos artificiales como en este caso. Con un marcador negro le hacemos las líneas. Asegure con una gota de cianoacrilato.


3. A continuación amarramos un poco de pelo de venado (bucktail) a lado y lado para evitar que la cola se enrolle en el anzuelo. De nuevo aseguramos con cianoacrilato.


4. Podemos cambiar el hilo si la cabeza es de otro color o mantener el mismo. Atamos el pelo de venado que formará la cabeza de atrás hacia adelante. Es importante no cortar el pelo que se levanta, este ayudará a mantener la cabeza.


En caso de hacer la cabeza de distintos colores quedaría así:


5. Una vez queden todos los lados llenos, añadimos crystal flash de la misma manera en que atamos el venado. Lo abrimos en forma de abanico.


6. En este punto, pasamos el hilo hacia adelante y formamos un cono que apriete los pelos hacia atrás. Ojo!! no pase el hilo por encima de los pelos.


7. Teniendo los pelos ligeramente hacia atrás, procedemos a ubicar los ojos con cianoacrilato. Podemos hacer un whip finish y cortar el hilo o dejarlo para cortarlo más tarde con el pegante.


8. En este punto preparamos el epóxico y lo aplicamos por encima de los ojos, sobre los pelos y el hilo manteniendo una línea entre los ojos para que no sea excesivo. Sobretodo muy poco en la parte inferior para que al endurecerse no evite un buen remate del anzuelo.


9. Antes de que el epóxico se empiece a endurecer peinamos los pelos hacia atrás y los aseguramos con alguna cinta alambrada.


10. Apenas el epóxico se endurezca, podemos soltar la cinta y la mosca queda terminada.


La distancia entre los ojos puede ser mayor o menor, entre más separados estén estos entre sí, mayor será el desplazamiento de agua.

Otras caras y colores de Reducers:


Úsela con línea flotante o con línea hundida, es una mosca que se hace notar a cualquier profundidad, también es una buena alternativa para aguas un poco oscuras.
Es una mosca perfecta para cualquier especie del Orinoco o del Amazonas.

Buena pesca!!!

Recuerde capturar y soltar!

© Armando A. Giraldo – Derechos exclusivos sobre imágenes y textos


jueves, 15 de diciembre de 2011

DUBBING BRUSH BENDBACK FLY

Los Bendbacks son moscas que trabajan con el anzuelo hacia arriba, sin pesos, lo cual tiene bastantes ventajas si se quiere trabajar en matas, piedras o palos. Funcionan muy bien entre juncos! Y ésta en especial al tener estos pelos cubriendo la punta del anzuelo evitan histerias en sitios en los que potencialmente un buen pez puede estar acechando.

Este atado es otra versión del churrusco que podemos hacer mediante un dubbing loop para crear cabezas y perfiles altos.


Materiales e instrucciones

ANZUELO - mustad 34007 #2/0

HILO - flat waxed blanco

 COLA - saddle hackles blancos
                                                 BRILLOS - flashabou perla y azul

CABEZA - kinky hair blanco y azul

BRILLOS CABEZA - wing n flash rosado

OJOS - 3d verdes

- Herramienta para dubbing loop
- Cianoacrilato y cemento


1 - Doblamos levemente el anzuelo calculando 3 ojos hacia atrás para que funcione con el anzuelo hacia arriba y nos de una superficie recta para amarrar la mosca.

2 - Amarramos los hackles y el flashabou perla y azul en la sección que doblamos previamente. Lo demás no lleva ningún material.

3 - Una vez los hackles queden amarrados, hacemos un dubbing loop en el sitio y llevamos el hilo hacia adelante, dejando descansar el portabobinas en el “bobbin craddle”. Es bueno mojar los hackles y el flash para que se queden en un solo sitio y no molesten mientras se amarra lo demás.

4 - Cogemos el dubbing loop con la herramienta que nos permitirá girar los materiales mas adelante. Es importante encerar el loop para que los pelos no se deslicen y se mantengan en el sitio.

5 - A continuación, cortamos el kinky hair azul y blanco. Los mezclamos y los cortamos de unos 7 a 8 cm, esto según el tamaño de la mosca. Una ves cortados, les ponemos wing n’ flash y los ordenamos dentro del dubbing loop.

6 - Una ves asegurado todo, procedemos a darle vueltas a la herramienta, hasta formar un “churrusco”. A medida que vayamos entorchando el dubbing loop, podemos ir sacando pelos y brillos que se vayan enredando con una aguja. Es importante asegurar bien mediante vueltas.

7 - Llevamos el “churrusco” hacia arriba y empezamos a darle vueltas a la prensa para que nos ayude a enrollar los pelos. Si no se tiene una prensa que gire, lo hacen con la mano y sumo cuidado.

8 - A medida que avanzamos, vamos peinando los pelos hacia atrás. Es importante mantener la tensión a medida que giramos la prensa y llenamos el espacio que nos queda en el anzuelo antes del ojo.

9 - Aseguramos los pelos hacia atrás, traemos el portabobinas hacia adelante amarrando lo que queda del “churrusco” al anzuelo y cortamos el exceso. Quitamos el bobbin craddle para que nos quede el camino libre.

10 - Con una aguja, desentorchamos pelos que hallan quedado enredados entre el anzuelo. Se puede ejercer bastante fuerza para sacarlos, siempre y cuando se halla mantenido la tensión constante mientras se amarraban.

11 - Con una peinilla, organizamos y desenredamos los pelos, peinándolos hacia atrás.

Debe quedarnos esto!
NOTA: Los pelos actuan como “weed guards” y evitan que la mosca se enrede con facilidad.


12 - Pegamos los ojos, con cianoacrilato. Esto también ayuda a asegurar todo el material al anzuelo, haciéndolo más resistente a los mordiscos.


13 - Terminamos la mosca con cemento para el hilo y un poco hacia los ojos para que no se despeguen fácilmente. Si está demasiado peluda y se quiere peluquear un poco entonces se pule en este punto.


Una buena mosca que se puede amarrar en anzuelos del 6 al 2 para Trucha, o en anzuelos del 1/0 al 3/0 para peces más grandes en aguas cálidas o en el mar. 

Buena pesca!!!

Capture y suelte!!

© Armando A. Giraldo – Derechos exclusivos sobre imágenes y textos